Masken Tutorial

Da es viele Leute da draußen gibt, die gerne Masken herstellen möchten, aber nicht wissen wo sie anfangen sollen, ist hier eine Schritt-für-Schritt Anleitung, mir der ihr selbst Masken herstellen könnt – sei es für euch, eure Familie und Freunde oder um sie an eine Organisation zu spenden, die sie dringen braucht. Solltet ihr eine solche kennen, teilt es uns doch bitte mit, damit wir sie weiter unten im Beitrag verlinken können!

Was brauche ich?

  • Baumwollstoff, waschbar bei 90°C (alte Bettwäsche, Geschirrtücher,… keine elastischen Stoffe!)
  • Garn
  • Papier
  • Schere (und/oder Rollschneider, wenn ihr sowas habt)
  • Stecknadeln
  • Lineal
  • Stift
  • (Draht)

wie fange ich an?

Als erstes erstellen wir unser Schnittmuster. Keine Angst, das ist ganz einfach.
Nehmt euren Stift und malt ein Rechteck mit den Seitenlängen 17x18cm.
Die kurzen sind folgend oben und unten, während die langen Seiten rechts und links sind.

Wenn ihr fertig seid, messt von oben 3cm ab und zieht eine Linie. Messt von dort aus 2cm und zieht erneut eine und nach 2cm nochmal eine. Macht damit weiter, bis ihr 6 Linien habt.

Lasst uns jetzt die Bänder vorbereiten. Für eure Masken braucht ihr 4 Bänder von je 4cm Breite.
Zwei davon mit einer Länge von 10cm.
Und die anderen zwei mit einer Länge von 85-90cm. Die langen Bändern werden übrigens die sein, mit dem ihr die Maske fest binden werdet. Dafür sollten sie also lang genug sein.
Schnell schneidet es sich mit einem Rollschneider, aber ihr könnt auch eine Schere dafür benutzen.
Wenn ihr zu faul seid, dann könnt ihr auch Bänder mit einer Breite von 2cm kaufen (Schrägstreifen, Köperbänder…). In diesem Fall überspringt den nächsten Schritt.

Wenn ihr fertige Bänder gekauft habt, überspringt diesen Schritt:
Jetzt da ihr die Bänder geschnitten habt, faltet sie mittig, bügelt sie. Anschließend öffnet ihr sie und faltet dann die Seiten zur Mitte hin. Faltet das ganze zusammen und bügelt sie erneut. Ihr solltet nun Streifen von 1cm Breite haben.

Hier geht es nun weiter:
Nun ist das Schnittmuster dran. Legt euren Stoff so hin, dass er doppelt liegt und ihr zwei Lagen auf einem schneidet (wenn eurer Stoff zwei unterschiedliche Seiten hat, legt sie so, dass die Seiten oben und unten liegen, die auch später sichtbar sein sollen). Pinnt euren Schnitt fest und schneidet diesen aus.
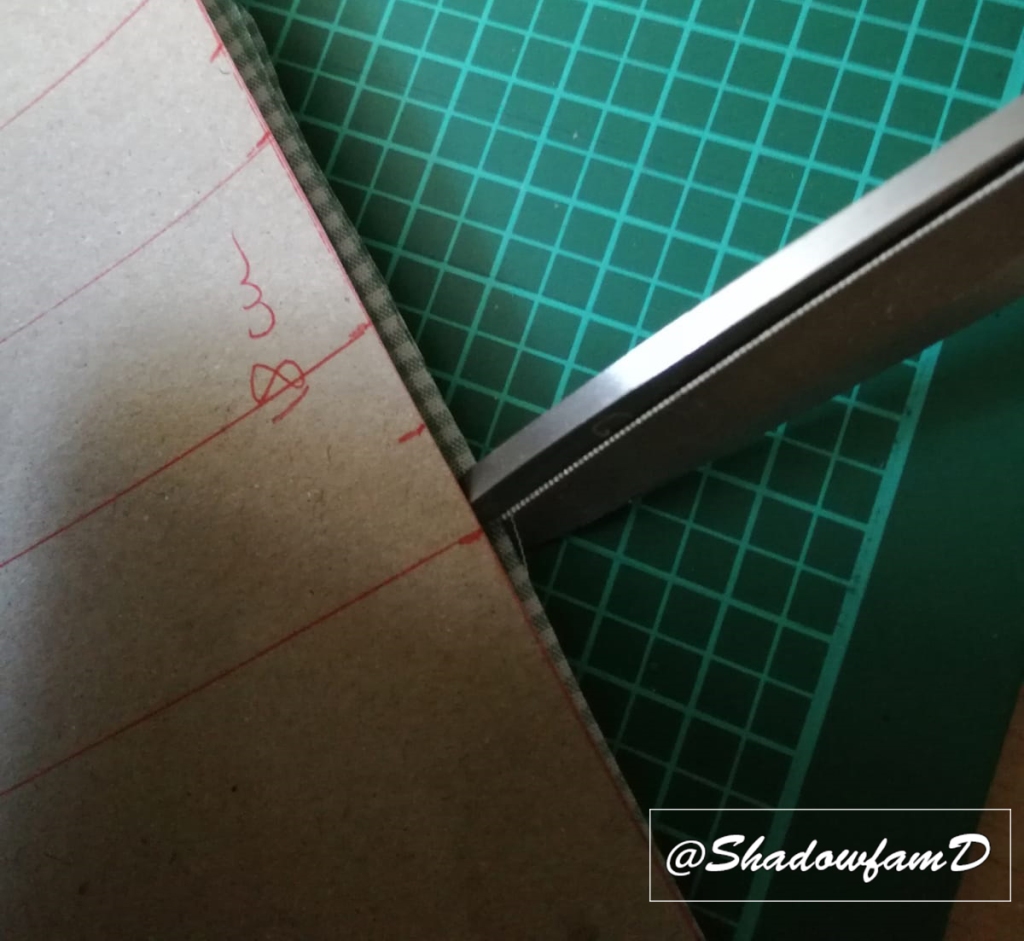
Bevor ihr danach das Schnittmuster entfernt, macht auf höhe der Linien, die ihr eingezeichnet habt, an den Seiten kleine Einschnitte (~3-5mm).
Entfernt nun das Papier und steckt euren Stoff sofort zusammen. Die Rechtecke sollten nun so aussehen, mit kleinen Schnitten an den Seiten. Da bei mir beide Seiten gleich aussehen habe ich mir ein X auf die Rückseite gemacht (dann könnt ihr es auch besser im Tutorial verfolgen).

Der nächste Schritt sind die Falten. Lasst dabei beide Schichten Stoff aufeinander, die Vorderseite nach oben. Faltet den oberen Teil am dritten Schnitt nach unten.

Dann falten diesen teil am zweiten Schnitt wieder nach oben. Der erste Schnitt sollte nun auf gleicher Höhe mit dem dritten Schnitt sein.

Macht dasselbe mit den Schnitten 4-6. Falten an 6 herunter, faltet an 5 hoch und 4+6 sollten nun aufeinander liegen. Pinnt alles fest und bügelt es, damit es so aussieht.

Näht die Falten zusammen

Jetzt kommen die Bänder dran! Nehmt ein 10cm Band und dreht eure Maske um. Faltet das Band auf und pinnt es auf die Rückseite eurer Maske, näht es dann in der Falte fest.

Dann dreht eure Maske wieder um, faltet das Band um die Maske herum und näht es von vorne fest, damit es so aussieht. Macht das auf beiden Seiten.

Nehmt nun eines der langen Bänder, dreht die Maske um, sodass ihr wieder auf die Rückseite schaut. Markiert die Mitte eurer Maske und des Bandes und pinnt beides aufeinander. Näht beides zusammen, wie ihr es bei den Seiten gemacht habt.

Dann dreht die Maske zur Vorderseite, faltet das Band um die Maske und näht das Band vom Ende, über die Maske, zum anderen Ende in zusammen. Macht das dann mit der letzten Seite ebenso.

Versäubert die Enden des Bands. Dafür eignet sich ein Zickzackstich.

Damit ist die Maske fertig!

Für den Fall, dass ihr spenden möchtet, akzeptieren manche Organisationen nur Masken, in die man an der Nase einen Draht einsetzen kann. Hier zeigen wir euch noch wie das geht.

Nehmt ein Stück Stoff in der Größe von 2,5x10cm. Versäubert die kurzen Seiten, faltet und bügelt den Stoff. Jetzt näht die langen Seiten zusammen, schließt aber nicht die kurzen Seiten!

Dreht eure Maske, sodass ihr die Rückseite seht. Legt die gefaltete Kante eures Stoffstücks an die obere Kante eurer Maske und näht so nah wie möglich an der Kante beides aufeinander.

Herzlichen Glückwunsch! Ihr habt eure erste Maske mit Drahteinsatz genäht.

Mask sewing tutorial

As there are many people out there who want to make mask but don’t know how to start, here is an easy step by step tutorial to follow so you can make your own masks – either for you, your family and friends or to donate to a place where needed. If there is a place you know is in need of masks, let us know and we will put a link below!

What do I need?

  • cotton fabric, washable with 90°C (old bed sheets, tea towels,… stay away from elastics)
  • thread
  • paper
  • scissors (and/or rolling knife if you have one)
  • sewing pins
  • ruler
  • pen
  • (wire)

How to start…

First of all we’re making our sewing pattern. Don’t worry. It’s really easy.
Take a pen and draw a rectangle with 17x18cm
The short sides are top and bottom, the long sides are left and right.

When you’re done with that, measure 3cm from the top and draw a line, then after 2cm draw another one and after 2cm another one and so on until you have 6 lines.

Now let’s prepare the ribbons. For your mask you will need 4 ribbons with 4cm width.
Two of them with a legth of 10cm and the other two about 85cm-90cm.
The long ones are going to be the long pieces you tie around your head.
I cut them with a rolling knife but you can easily use scissors as well.
If you are too lazy, get prepared ribbons with a width of 2cm in that case you can skip the next step.

Skip this if you bought ribbons at the store:
Now that you cut your ribbons you need to fold them in the middle, iron them, open them and fold the sides to the middle. Then fold and iron them again. You should now have ribbon of about 1cm width.

Let’s go on with the pattern now. Put down your fabrics so it lies double and you can cut two pieces at the same time (if your fabric has two different sides, put the sides you don’t want to see together). Pin your pattern down and cut it.
When you’re done, before taking off the pattern make small cuts into your fabric (~3-5mm) where you drew the lines on your pattern.

After that detach the pattern. Your fabric should look like this now with the small cuts on each side.
Because my sides both look the same I made a pink X on the back side (making it also easier for you to follow this tutorial)

Next step is making the folds. Keep the fabric double, the front facing you. Fold down the upper part at the third cut.

Then fold it upwards at cut two. Cut one should now align with cut three.

Do the same with cuts 4-6. Fold down on 6, fold up on 5 and 4+6 should now align. Pin it down.
Iron it and it should look like this:

Sew together the folds

Now it’s time for the ribbons! Take a 10cm ribbon and turn your mask around. Now fold your ribbon open and pin it to the back side of your mask. Sew in the folding crease.

Then turn around your mask again, fold the ribbon around and sew it from the front, so it looks like the following image. Do that on both sides.

Now take the long ribbon, turn your mask around again so you look at the back of it. Search for the middle of mask and ribbon and pin it down on top, sew it like you did with the sides.

Then turn it around, fold down the ribbon and sew from the end of the ribbon, through the mask and to the other end of the ribbon so everything is held in place. Proceed like that with the bottom of the mask as well.

Hem the ends of the ribbons. I used a zigzag stitch for that.

Now your mask is done!


In case you want to donate it, some organizations only accept them if there is a place to put a wire through. So we’ll show you how to make that.

Take a piece of cotton. Cut a 2,5x10cm piece and hem the short sides, then fold and iron it.
Sew the long sides together. Don’t close the short sides! Otherwise the wire can’t be put in.

If you’re done with that, turn your mask around, pin the folded part to the top of your mask and sew as close to the edge as possible.

Congratulations! You made your first wired mask!

Guilty Of Acting Like A Nephilim?

[German translation below/Deutsche Übersetzung weiter unten]

We all know our dearest Shadowhunters families are as colourful as they come. And for better and for worse, they all seem to have their very own distinctive characteristic and traits that can be associated with each of their family names (and that even seem to manifest themselves across multiple generations).
Too caught up in your own family headspace? This is how fellow Nephilim might call you out (and what they mean while saying it): when they use your very own Shadowhunter name against you in verb form.

to herondale
Example for an expression: herondaling oneself (and likely others) into a dangerous situation
Meaning: being way too reckless (and maybe a little too confident in one’s own abilities)

to lightwood
Example for an expression: lightwooding around
Meaning: owning the place like the king / queen you are (but maybe coming across as just a little posh)

to carstairs
Example for an expression: stop carstairing your problems
Meaning: enduring too much (and not being as vocal about your own problems as you should be)

to fairchild
Example for an expression: fairchilding a conflict
Meaning: being a total badass and quick to act (but maybe overlooking the option of diplomacy quite a few times in the process)

to blackthorn
Example for an expression: blackthorning that family problem
Meaning: Being wrapped up and busy in your caring for your loved ones (and isolating yourself and being a bit sulky and brooding in the process)

to branwell
Example for an expression: they totally branwelled during that conflict
Meaning: being calm and collected and observant even during crisis (but maybe being a bit too passiv from time to time

to graymark
Example for an expression: graymarking a relationship
Meaning: being very loyal (maybe too much and to one’s own detriment)

to morgenstern
Example for an expression: morgensterning one’s goals
Meaning: Being very dedicated (and..maybe even willing to burn everything down in the process)

At least one thing is very clear, even when they are at their most stereotypical family self, we all love our Shadowhunters regardless.

(special thanks at former tumblr account incorrect-sh-quotes for kickstarting this)

Text by @seaconspiracies


Verhältst Du Dich Wie Ein Nephilim?

Wir alle wissen, unsere geliebten Schattenjäger Familien sind so unterschiedlich, wie man sie sich nur vorstellen kann. Und sowohl zu ihrem Vor- wie auch zu ihrem Nachteil, scheint doch jede der Familien ganz unterschiedliche Eigenschaften und Macken aufzuweisen (die sie offenbar anscheinend manchmal sogar noch an ihren Nachfahren vererben).
Selber manchmal ein bisschen zu gefangen, in deinen eigenen Familiengewohnheiten? Grund genug für die Nephilim um dich herum, dich darauf subtil aufmerksam zu machen (und dir dabei durch die Blume eigentlich etwas ganz anderes mitzuteilen), indem sie ganz einfach deinen eigenen Schattenjäger Namen in Verbform verwenden.

heronadalen (v)
Anwendungsbeispiel: sich selbst (und wahrscheinlich andere) in eine gefährliche Situation herondalen
Bedeutung: viel zu risikofreudig sein (und vielleicht auch ein wenig zu überzeugt vom eigenen Können sein)

lightwooden (v)
Anwendungsbeispiel: herum lightwooden
Bedeutung: den Raum mit der eigenen Präsenz ganz einnehmen und bestimmen (mit der leichten Gefahr dabei auch ein bisschen arrogant zu wirken)

carstairen (v)
Anwendungsbeispiel: hör auf deine Probleme zu carstairen
Bedeutung: zu viel auszuhalten und auf sich zun ehmen (und dabei vielleicht nicht in dem Umfang über die eigenen Probleme zu sprechen wie man eigentlich sollte)

fairchilden (v)
Anwendungsbeispiel: einen Konflikt fairchilden
Bedeutung: total hardcore und schnell eine Situation lösen (auch wenn man dabei unter Umständen mal wieder komplett übersieht, dass Diplomatie hier auch eine Lösung gewesen wäre)

blackthornen (v)
Anwendungsbeispiel: das Familienproblem blackthornen
Bedeutung: sehr beschäftigt damit sein sich um seine Lieben zu kümmern (und sich dabei zu isolieren und ein bisschen vor sich hin zu schmollen)

branwellen (v)
Anwendungsbeispiel: sie haben während der Auseinandersetzung total gebranwelled
Bedeutung: ruhig und gesammelt sein, auch in Krisensituationen Dinge und Zusammenhänge beobachten (und dabei vielleicht von Zeit zu Zeit etwas zu passiv zu sein)

graymarken (v)
Anwendungsbeispiel: eine Beziehung graymarken
Bedeutung: sehr loyal sein (vielleicht sogar zu sehr und damit zum eigenen Verhängnis)

morgensternen (v)
Anwendungsbeispiel: die eigenen Ziele morgensternen
Bedeutung: sich seeeehr auf Dinge konzentrieren und ihnen hingeben (und…vielleicht dabei sogar willig zu sein, Dinge vollkommen dem Erdboden gleich zu machen, sollte es denn nötig sein…)

Eins steht dabei aber auf alle Fälle fest: selbst wenn sie mal total den Gewohnheiten ihrer eigenen Familie verfallen, unser Schattenjäger lieben wir selbst dann noch.

(Danke an den ehemaligen Tumblr-Account incorrect-sh-quotes, die das hier überhaupt erst losgetreten haben)

Text von @seaconspiracies

The Stew? I still have nightmares.

And friend and I spent a very entertaining two hours trying to establish what went so horribly wrong with The Stew. We came up with a recipe for a culinary catastrophe… which started as a perfect valid stew ingredient list and turns into a nightmare if you don’t have proper instructions, and wrongly translate some ingredients. It also explains the radish.

After some research we came up with the recipe for a stew called Menudo, a popular hangover dish in Latin America according to several recipe sites, that comes with a sauce and other components for serving. The ingredient list is… interesting as it is (contains cow’s feet and the lining of a cow’s stomach), but it’s a perfectly valid stew recipe. Then we found us another stew recipe and added that to the disaster zone. And when you make a few mistakes in translation and don’t have proper instructions, you end up chucking the components of two dishes (plus additional periphery for serving) into a single pot to make a stew.

Starting point was my own cooking, or more precisely, how I treat my personal recipes. I usually just jot down the ingredients to aid my memory because I know what to do with them. If you don’t, then all you see is a list of various ingredients in no particular order. Also, me being bilingual, I sometimes write things down in the language they first pop up in, leading to some recipes being in a very random mix of two languages.

We did that with the Menudo recipe and translated a few ingredients into Spanish, and god did we spend a long time trying to find ingredients that you can confuse with something else if you’re not fluent.

Then I wrote the ingredient list down onto a card the size Alec shows to Magnus, and used a tiny scrawl – because the ingredient list is long – with a blunt pencil.

I then added another stew ingredient list on the same card and separated the two with a line, but still, no instructions because I don’t need those, right? Because I’m grandma Trueblood and I have been making these stews for five decades.

So the ingredients list for Menudo (left purposefully vague because these are my recipe notes and I know what I am doing):

First the stew, then the chili sauce.

Honeycomb tripe, beef tripe, beef feet (patas), yellow onion, 3 small heads of garlic, cloves of garlic, peppercorns, salt, oregano, bay leaves, arbol chiles, guajillo chiles, chicken stock, white hominy, cumin

And the part that says To Serve

Oregano, red chile powder flakes, limes and lemons, onions, cilantro, corn tortillas, butter

Now without instructions you end up chucking all of the above into a single pot instead of making the stew, a sauce for the stew, and keep the things that are served together with the stew.

The translation mistakes we put in were:

Patas: instead of the beef feet the poor kids read patacon, which are fried slices of cooking bananas, ergo, bananas. Cloves of garlic can be misinterpreted as cloves and garlic. Honeycomb tripe… that’s honey, right? Bananas and honeycomb, makes total sense. Hominy is specially treated and if I understood correctly, fermented corn, and cooked, is slightly reminiscent of old popcorn. So, popcorn it is.

But then comes the right half of the card, which contains another stew, a stew made of calamari and potatoes. But the Lightwood kids don’t know that they are looking at two recipes.

Again, this is a vague ingredient list because grandma Trueblood knows her stuff:

Squid rings, onions, 1 large red pepper, cloves of garlic, olive oil, bay leaves, dry white wine or sherry, fish or shrimp stock, diced potatoes

The squid rings are called rabas, but the Lightwood kids mix up rabas and rabano, which means radish.

So what the poor kids ended up with is a stew made of bananas, honey, cloves, a shit ton of garlic, red pepper, salt, onions, oregano, a handful of bay leaves, peppercorns, chicken stock and fish stock, squid rings, potatoes, popcorn, cilantro, cut-up lemons and limes, a shit ton of chilies, white wine, sherry, and radishes.

I would spit that into my coffee mug as well.

-written by @lakritzwolf